Below is a description of how to obtain the credentials required to connect Boxify with FedEx in order to display your company's FedEx rates at checkout.
Note that FedEx will be phasing out support for its (legacy) Web Services API on 1 June 2026, so it is important to connect Boxify with FedEx's new (REST) APIs. To obtain credentials for FedEx's new APIs, go to FedEx.com, log in, then direct your browser to FedEx's Developer Portal.
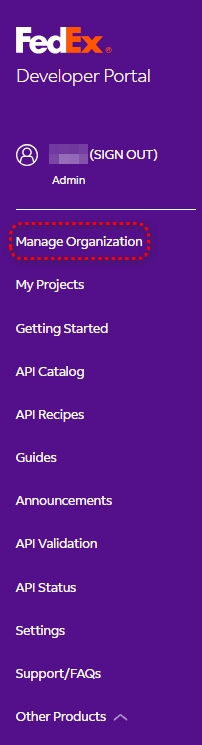
As a preliminary step, click on "Manage Organization" at the left.
Click on "Add Account" to add your FedEx account and configure yourself (and any others at your company that you care to include) as users on FedEx's Developer Portal.
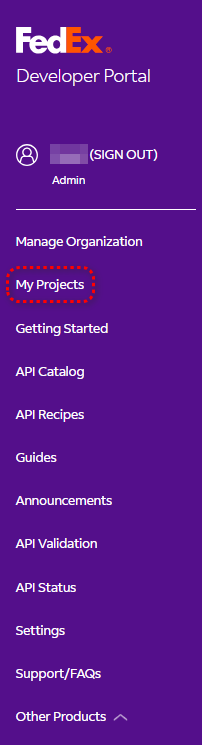
Now click on "My Projects" at the left.
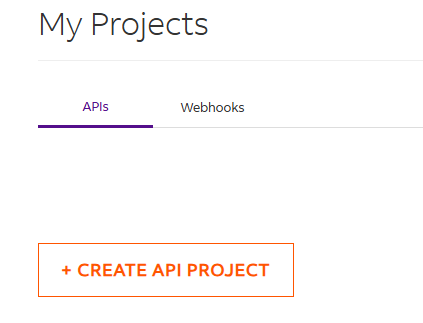
Then click on "Create API Project."
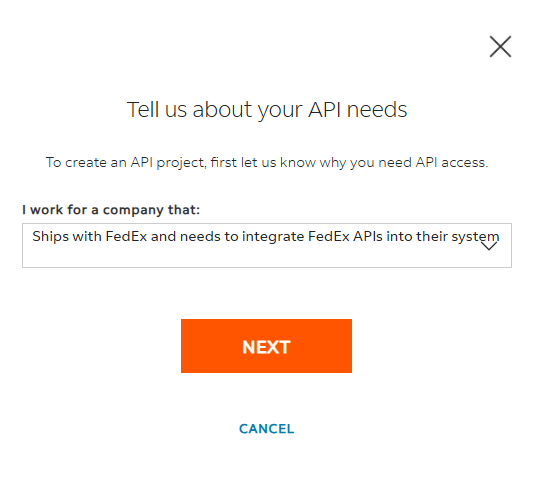
At the prompt ("Tell us about your API needs"), select the option that reads, "Ships with FedEx and needs to integrate APIs into their system," then click on "Next."
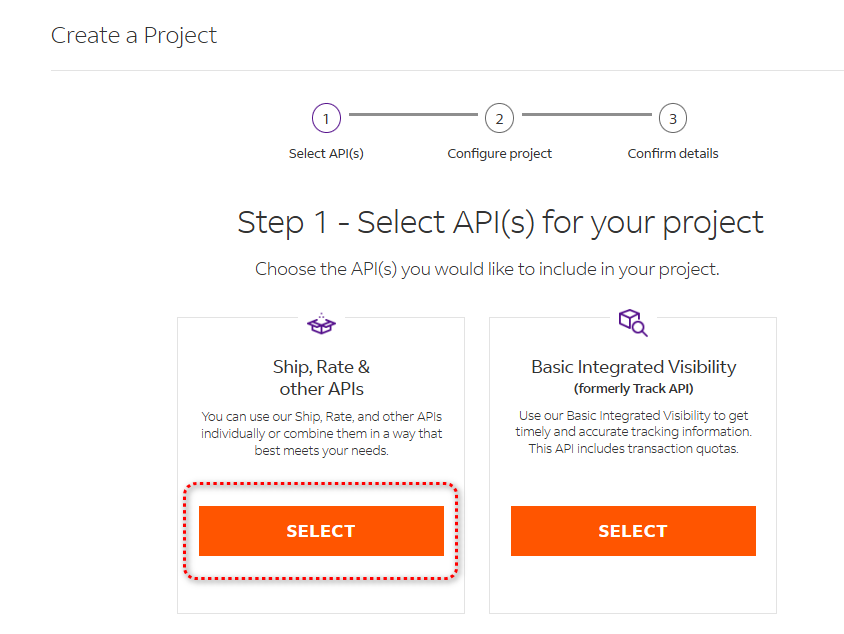
At this point, you will be asked to complete Step 1: Select API(s) for your project. Click on "Select" under "Ship, Rate, & other APIs."
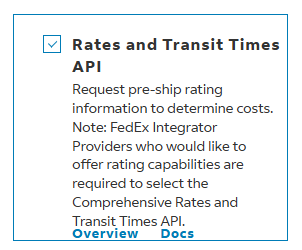
Then, using the checkboxes below, select the Rates and Transit Times API, which will allow your shop to display rates for shipping in conventional shipping boxes.
Note that Boxify is also able to use FedEx's Comprehensive Rates and Transit Times API to compare normal FedEx rates and One Rate FedEx rates and offer whichever is less expensive. It can do this for shipping in FedEx packaging or for shipping in your packaging (if you check the checkbox for this when you activate FedEx in Boxify). But to obtain that functionality, you'll need to include the Comprehensive Rates and Transit Times API (along with the Rates and Transit Times API) in the project you create on FedEx's Developer Portal.
Including the Comprehensive Rates and Transit Times API used to be straightforward, but FedEx has recently made this much more difficult. You have to first contact your FedEx rep and request production access to this API. Your rep in turn will have to contact a FedEx Customer Technology Consultant to ask that you be granted such access. All to say, it promises to be a cumbersome process. With luck, FedEx will rethink this recent change and make it easier for merchants to include this API in the projects they create.
After you have added the Rates and Transit Times API (and, if available to you, the Comprehensive Rates and Transit Times API), click on the "Next" button at the bottom.
Now you will be asked to complete Step 2: Configure Project. So give your project a name (which can be anything), and indicate what countries you'll be shipping from and to. Leave the two radio buttons set to "No." Click on the "settings" link if you want to set up notifications from FedEx, say, to be informed of any planned maintenance outages.
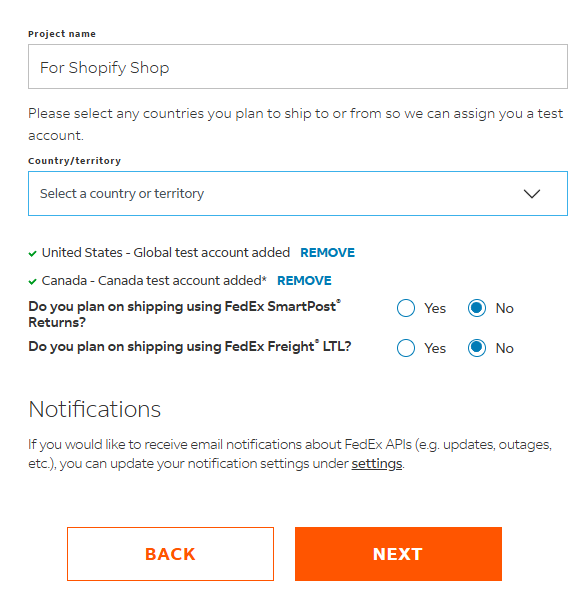
Then click on the "Next" button to continue.
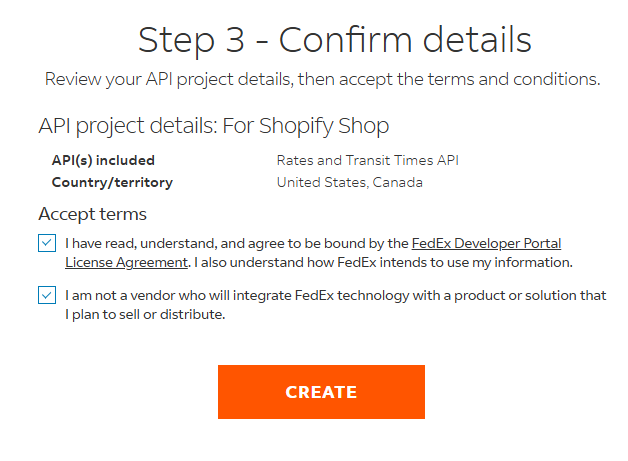
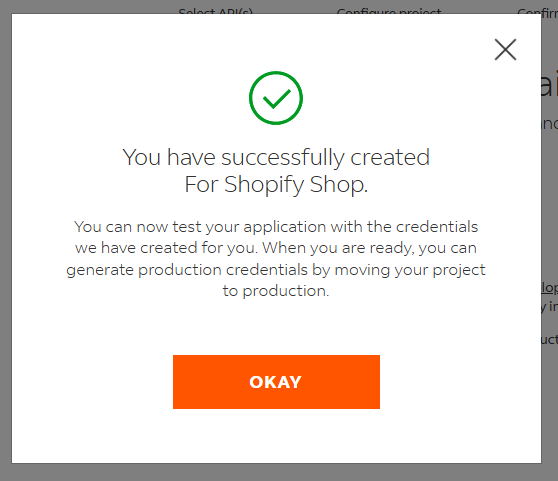
Finally, complete Step 3: Confirm details. Here just agree to FedEx's terms and click on "Create."
At this point you will have successfully created your project.
Your newly created project will then be seen on the My Projects page. So click on "My Projects" at the left.
Click on your project and then on the "Production Key" tab at the top (do not select "Test Key").

You'll now need to select a FedEx account to associate with this project (if you have multiple FedEx accounts).
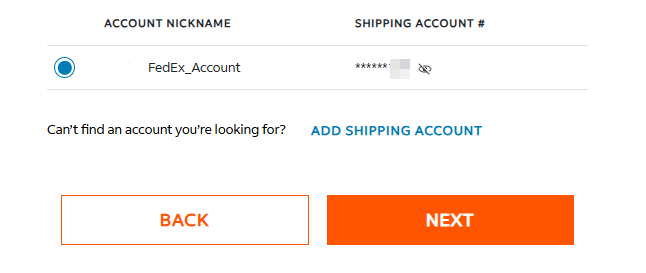
Select the account you want Boxify to show rates for, then click on "Next."
Congratulations! You will at this point be presented with Production keys: one is the "API key" and the other is the "Secret key."
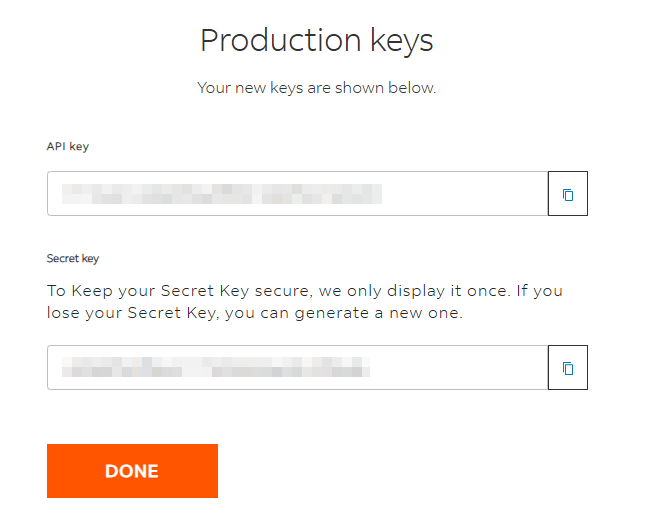
Copy both of these credentials and save them in a safe place.
Now navigate to the Boxify dashboard, scroll down to the section on shipping carriers, and click on "Configure FedEx." Then click on "Connect with new (REST) API, and enter the API key and Secret key in Boxify to activate FedEx.